Here in mid-Missouri we're at that tipping point where the annual cycle of growth is about to accelerate wildly. Every morning now will bring some new bit of color to the tatters left by winter. It's an exciting time. You need to keep your eyes wide open for every little change. How can I be sure this is really that moment when there is no doubt that spring has arrived? Here are the signs -
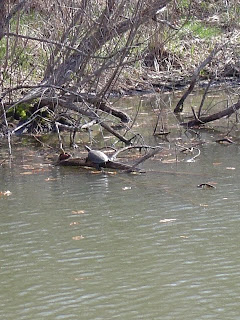
All day long and then with even more gusto at night, the spring peepers have been serenading us from down at the pond. Their song is so sweetly romantic and hopeful. I love to sit on the back porch in the dark and listen to their singing, almost like a bedtime lullaby. Now each morning the painted turtles clamber up on fallen branches at the pond's edge to sun themselves. It must feel wonderful to finally leave the chilly mud and let the sun warm their shells. When I walk around the pond, they slip back into the water in a fluid, unconcerned manner, as if I am someone they know, don't especially dislike, but they simply don't want to talk to just now.
Out in the garden, while it's been far too muddy to plant, the weather is settled enough for me to pull the covers off the beds of greens we planted last autumn. Lo and behold, the spinach is growing and big enough to harvest a bit to perk up our dinner salads. There is something so extraordinary, so rich and buttery about this first spinach. Could it be that its fresh taste shouts "Wake up!" to our winter-dulled taste buds?
All around the yard and across the pond under the trees, clusters of daffodils are blooming. Is there anyone who doesn't like daffodils? I can't imagine it. They come in so many shapes. Some with long trumpets, some with short flattened trumpets, whites, pale yellows, brilliant yellow-golds. Some with double ruffly petals and an indistinct trumpet. Some with their petals tossed backward as if they'd been facing into the wind for days. One of my favorites has white petals with a rosy-peach trumpet. We only have a few of these, but daffodils very thoughtfully multiply over the years.
Wait a minute... Is this a sign of spring? It's sure no Easter rabbit that I've ever seen. No indeed, but after I finished knitting and felting this little hedgehog, he seemed anxious to get outside and check out the daffodils for himself. I couldn't resist posing him here and there around the backyard. I suppose it's a good thing the houses are spread out in our neighborhood; people might think I'd eaten one too many marshmallow peeps.
The pattern for the little hedgehog is from Fiber Trends, a Debbie Radtke design. The yarns are Cascade 220 Heathers and Lion Brand Fun Fur. I've made a number of these critters over the years and always enjoy making them. It's a quick and easy pattern. This particular little guy will be a gift for a friend who is expecting a baby in mid-May.
So now let's all bid farewell to March which is indeed going out as gently as a newborn lamb. Savor these days. Each one holds small and fleeting delights, things to feed your senses and soul. Happy Easter. Happy Spring!
Wednesday, March 31, 2010
Wednesday, March 17, 2010
Never Stop Learning
As immersed as I've been in the fiber arts for all of my adult life, I'm sorry to admit that my sewing skills are few. I never had any home economics classes in high school or before. The little I know has been cobbled together on my own, with the result that I've never made a garment with which I was really pleased. My confidence in my sewing was nil. So I felt considerable trepidation this past Saturday when I walked into Daryl Lancaster's Jumpstart Vest workshop, my handwoven cloth in my basket. Thanks to our local Guild, Daryl spent the weekend teaching eleven of us how to create a vest that fits well using our handwoven yardage.
Here's a detail of my fabric which I wrote about in my last post. Originally this fabric had been destined for other things, not a garment. But I ran out of time to weave something simpler, less patterned for my vest.
Using Daryl's master patterns, we each made our personal pattern that suited our own bodies and tastes. We spent Saturday making our patterns, marking and cutting the pieces in our yardage using tailor's tacks, and fusing interfacing to the neck and armhole bands. On Sunday we fired up our sewing machines and began assembling our vests. Daryl is a very knowledgeable seamstress, fashion designer, and a superb teacher. She helped each of us over any obstacles, and for those of us with slim sewing skills, there were many. I was nervous cutting into my fabric, wondering if I was dooming a nice piece of yardage to a dark dresser drawer forever. On Sunday I was still nervous as I began putting everything together. Now it's true, there were a few areas where I had to redo and redo yet again, but by Sunday evening, I left with my vest complete except for the hand sewing.
We all learned so many useful tips as we worked on our vests. Learning how to put in a lining was completely new to me. This armhole treatment was tricky but the finished edge is well worth the effort and ripping out a few times.
Daryl demonstrated how to make bias tape from the lining material. We then used it for a Hong Kong seam finish on the hem and for the ends of the armhole bands. I really liked the neat, unifying look of this technique, all raw edges nicely tucked inside the hem.
Hand hemming towels, runners, etc. is always relaxing for me, so Monday I finished up all the edges. After one last pressing, I tried it on. It fits great and I like it so well! At last night's Guild meeting many of us from the workshop wore our finished (or nearly finished) vests. There were big smiles all around. Each of us had a garment made from our own hands that fits and makes us happy to be wearing it. For myself, I have new confidence in my sewing skills and a renewed desire to drive my sewing machine again. The lesson here - it is never too late to learn. Never.
Tuesday, March 9, 2010
Yardage
It's been quite some time since I've woven a long piece of yardage. This cloth came off my 16 shaft Megado loom last week. On the loom it measured 5 1/2 yards. After wet-finishing, its length is 4 yards, 31 inches.
The warp yarns are a variety of 8/2 unmercerized cottons and cotton/linen blends, set at 24 ends per inch. For weft I used a lustrous 8/2 tencel yarn from WEBS. There are 12 colors in the warp which shade gradually to the center and then back to the other selvedge. The pattern, Fairy Hills, is one I've developed and use frequently. Among its many variations is this one which I call Double Pine Trees because viewed from one direction the design resembles a forest of little trees.
So what am I going to do with this almost 5 yards of cloth? Not towels, not table runners. It's for a special project coming up this weekend - and that's all I'm going to say for now, except that I've oiled up my sewing machine and purchased a packet of sharp and shiny new needles ...
Subscribe to:
Posts (Atom)